No matter your organization's size, test writing standards help QA teams cover the app, write clean tests, and build a suite that is resilient when code changes. We use the Arrange–Act–Assert (AAA) framework to help with that because it's flexible, specific, and efficient.
Throughout this article we’ll be using an example—creating a new photo slideshow of wolves in the wilderness—to help illustrate the AAA framework. But first, it’ll be helpful to define a few other terms that we use here at QA Wolf:
- Test. A test confirms that one event triggered one result. For example, adding a photo to a slideshow results in that photo being visible. Each test is defined in the test plan, outlined as code comments, and written in Playwright or Appium code.
- Workflow. A workflow is a series of tests that relate or build on each other. For example, before adding a photo to a slideshow you must create a slideshow. And only after adding the photo can you add a caption to it.
We also refer to the user in this post, which is the automated test-running robot written in code (Playwright or Appium in our case) that simulates a human user’s actions.
A walk through AAA outlining
Let’s make an outline for our example test: "Create a new photo slideshow” in which the user uploads photos to their account, creates a new (empty) slideshow, and adds their photos to it.
Arrange
Before you can test any bit of functionality, you have to set up—or Arrange—the application a certain way. For instance, to test whether a user can log out, you have to arrange a scenario where the user is already logged in. As you might expect, it's very common for the same user action to be tested multiple times and under different arrangements because bugs may appear in some cases but not in others.
When outlining the Arrange step, we recommend providing straightforward and brief instructions that minimize the risk of misunderstanding or errors in the test code. Let’s look at our “Create New Slideshow” example. We would like to arrange the test so that two photos are already uploaded to a designated folder.
We start by having the user log in to the site with a valid username and password. Next, the user opens a folder or creates one if necessary. Finally, we add photos to the folder so that there’s something for the “Create New Slideshow” test to pull from.
For this test, we don’t assert that the user logged in successfully or the folder was created, because other tests would cover both of those. Remember, a test confirms that one event has one result. By narrowly defining them this way, it’s easier to track down the bug when a test fails.
Act
The “Act” stage is where we describe the event to be tested (one event, one result). For our example, that means creating a new (blank) slideshow and adding two photos to it. (Other tests would be created for separate scenarios, like “user clicks the ‘Save’ button without adding any photos.”)
These narrowly scoped tests make it easier to track down bugs and maintain the suite.
A few things to note:
- Indicate where each element appears on the page (e.g., the “+” icon in the lower-right) to distinguish from similar elements.
- Use unique strings for all values (such as the slideshow name) where possible to avoid collisions during parallel runs.
- Label each photo (e.g., photo A and photo B) so QA engineers can follow the logic.
Assert
The last A in AAA is “Assert,” and it’s often the simplest. In our example, that means checking that a slideshow was created and a confirmation message appeared.
The example ends with an expected result: a confirmation message that appears and then disappears after saving the slideshow. Because the test is narrowly scoped and each step is explicit, a failing assertion at the end tells you something went wrong in the creation or save flow, not somewhere else. The AAA structure doesn’t guarantee instant answers, but it narrows the search and speeds up debugging.
Why AAA?
Standardized outlines make it easier for anyone to spot gaps in coverage, outline test cases, or jump in if a test fails.
Here’s a scenario: Say your test suite has these two tests…
- Create a new slideshow with two (2) photos
- Create a new slideshow with zero (0) photos
Let’s say the test for “create a slideshow with two photos” fails, but the one for “create an empty slideshow” passes. That tells us something useful.
Both tests go through the same general flow: open the slideshow form, fill it out, and click “Save.” If there were a problem with the creation flow itself—like form submission being broken—both tests would fail.
But only the one with photos fails. So now we know the core flow works, and the issue is likely with photo-related logic: uploading, validation, or processing. When the engineer sees that the test fails because the confirmation message doesn’t appear—and instead, there's a silent server error—they don’t need extra context. The tests have already narrowed down the likely cause.
One test, one outcome
A good AAA test proves one thing. Not two. Not five. Just one.
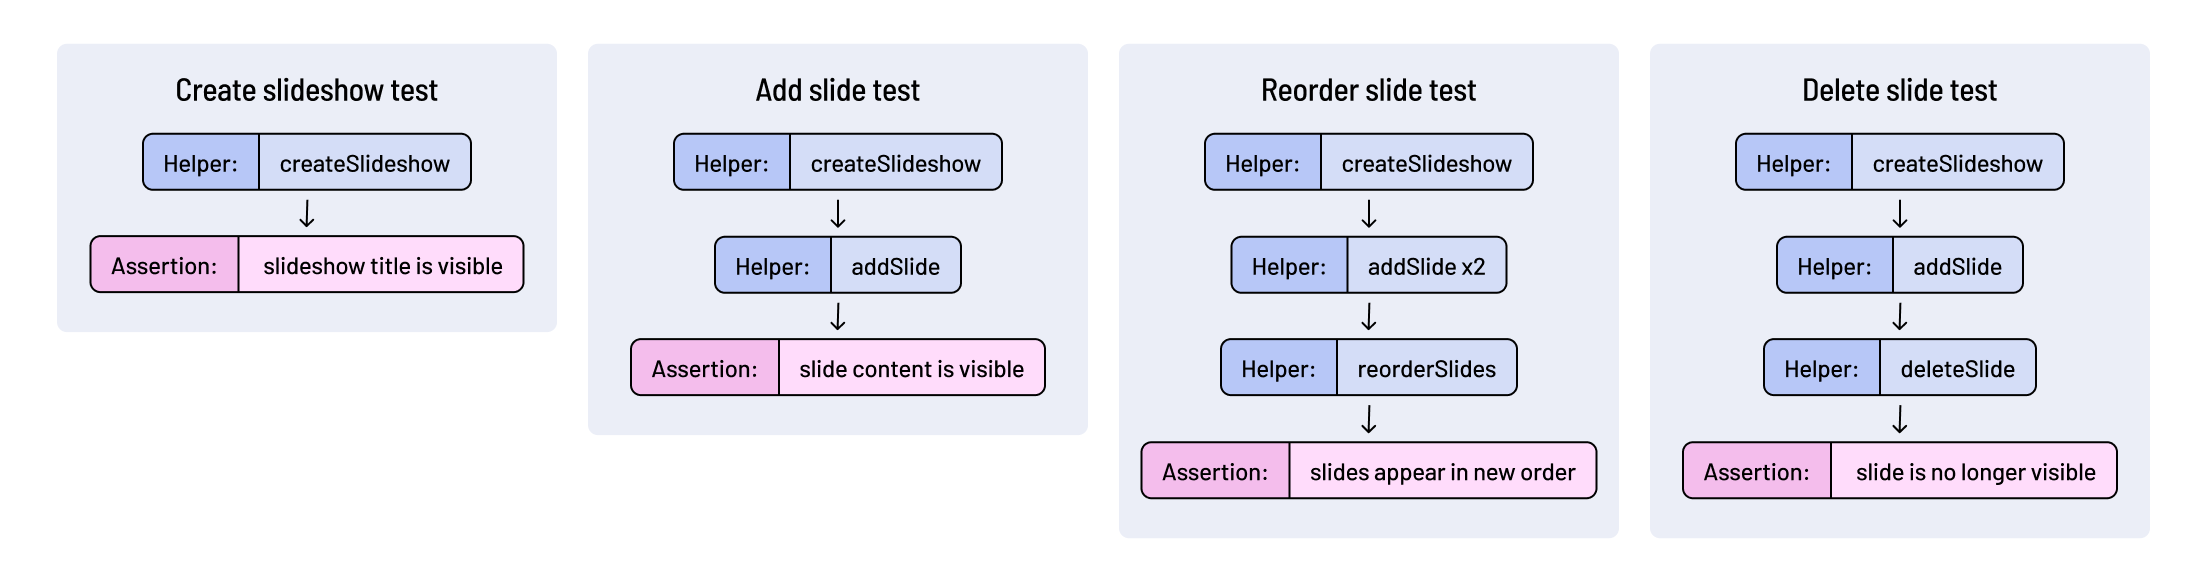
Let’s say you’re testing a slideshow feature. You might be tempted to write a single test that creates a slideshow, adds slides, reorders them, and deletes one. But when that test fails, you’ll have no idea which part broke—or why. And good luck debugging a 40-line blob with four assertions and three helper functions.
Instead, break it up:
- Create slideshow test: Validate the slideshow gets created
- Add slide test: Start with an existing slideshow, add a slide, assert it appears
- Reorder slides test: Move a slide, check new order
- Delete slide test: Delete a slide, verify it’s gone
Shorter tests also run faster. They rerun faster. They’re easier to read and easier to fix. And because they touch fewer parts of your app, they break less often.
If steps depend on one another—like needing a slideshow before you can add a slide—use shared Arrange logic to prep that state. Helpers shouldn’t assert. Your tests should make the call on what counts as success.
Standardize your language
We use “Click” for buttons and “Select” for menu items. That distinction makes it easier to tell elements apart—even when they have the same label.
Include cleanup steps
If your test creates something, delete it when you're done. A failed run might leave garbage data that clogs the environment. Adding a "Create a clean-up step" note in your outline ensures engineers remember to handle teardown logic.
How AAA compares to Behavior-Driven Development (BDD)
You might be familiar with Behavior-Driven Development (BDD). It was introduced as a way to design tests using a shared language that developers, testers, product managers, and business stakeholders could all understand.
The idea was that each test could also serve as a specification. Instead of writing separate documents for behavior and verification, you’d write one artifact that does both. The most recognizable BDD format is Given–When–Then (GWT). GWT aims to mirror natural language by splitting tests into three parts, much like AAA:
- Given: the initial state.
- When: the user action.
- Then: the expected outcome.
BDD frameworks like RSpec, Jest, Mocha, and Jasmine use describe and it for structured test labels. They aren’t natural language, but they do get parsed syntactically and offer a clear outline, if used well.
At a glance, BDD and AAA may look similar. Both use a three-part structure. Both aim to describe behavior. But the similarities end there. The difference lies in how much detail they capture and how useful that detail is when things go wrong. Where BDD favors abstraction, AAA demands specificity. A GWT test might say, “The user completes checkout.” An AAA test would spell out each interaction:
In other words, AAA reads like a set of repro instructions. The differences matter when you’re trying to fix a broken test. With BDD:
- You can’t identify what failed. The test description doesn’t tell you whether the problem came from a missing element, an unhandled exception, or invalid data.
- You don’t know what path the test took. Broad descriptions could cover multiple UI paths. Unless you wrote the test yourself, it’s hard to tell what was exercised.
- You miss test gaps. BDD encourages verifying outcomes, not steps. That makes it easy to overlook edge cases, alternate flows, or UI regressions.
AAA doesn’t try to be clever. It tries to be useful.
Final thoughts
Creating tests is a vital step in the QA process to ensure bugs are not shipped out to customers accidentally. With AAA, QA Wolf can outline tests quickly for our clients, speed up the engineering, and simplify long-term maintenance.